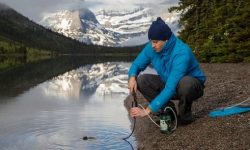
Alright, fellow adventurers and off-grid enthusiasts, let’s talk power – specifically, how to get it when you’re miles from the nearest outlet, deep in the heart of nature. If you’re like me, the allure of boondocking is irresistible: the solitude, the stunning views, the pure freedom of it all. But that freedom often comes with a challenge: keeping your essentials charged and running. That’s where the best portable solar panels for boondocking come into play, transforming your rig into a self-sufficient powerhouse.
I’ve spent countless nights under starry skies, from the desolate beauty of Utah’s red rock country to the dense forests of the Pacific Northwest. And through every trip, one truth has become crystal clear: reliable power is paramount. Generators are noisy, fuel-dependent, and frankly, a bit of a buzzkill for the peace you seek. Fixed solar panels are great, but they limit your parking options and can be a pain if your rig is parked in the shade. Portable solar? That’s the sweet spot for boondockers, offering flexibility, quiet operation, and sustainable energy wherever the sun shines.
In this comprehensive guide, drawing from years of real-world testing and plenty of trial-and-error, I’m going to break down everything you need to know about choosing the perfect portable solar setup for your boondocking adventures. We’ll dive deep into what makes a panel truly great, the crucial factors to consider, and how to maximize your off-grid energy harvest. So, grab a cup of coffee, settle in, and let’s get you powered up for ultimate freedom.
Why Portable Solar Panels Are a Game-Changer for Boondocking
Before we dig into the nitty-gritty, let’s briefly touch on why portable solar is the go-to solution for so many seasoned boondockers, myself included. It’s not just about being “green” (though that’s a fantastic bonus); it’s about practical, reliable power in dynamic environments.
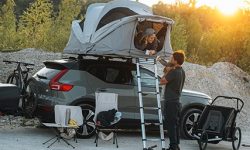
- Flexibility and Mobility: This is the big one. Unlike fixed rooftop panels, portable units can be positioned to capture optimal sunlight throughout the day, even if your RV or van is parked under a shade tree. You can chase the sun, tilting and repositioning your panels as needed, maximizing your energy gain. This is absolutely critical for maximizing the effectiveness of your best portable solar panels for boondocking.
- Easy Setup and Storage: Most portable panels are designed for quick deployment and compact storage. Many fold up into a briefcase-style package, making them easy to stow away when you’re on the move or when weather conditions aren’t favorable.
- Scalability: You can start with a smaller setup and add more panels later if your power needs grow. This modularity is a huge advantage over fixed systems.
- Backup Power: Even if you have a rooftop system, a portable panel can serve as an excellent supplement or backup, especially on shorter, cloudy days when every watt counts.
- No Permanent Installation: For renters, or those who don’t want to drill holes in their RV roof, portable panels are a non-invasive solution.
The ability to move your power source with the sun’s trajectory is, in my experience, one of the most underrated features of portable solar. It means fewer worries about finding that perfect, sun-drenched parking spot and more time enjoying the wild.
Key Factors to Consider When Choosing the Best Portable Solar Panels for Boondocking
Alright, let’s get down to brass tacks. Not all portable solar panels are created equal, especially when you’re relying on them for your power lifeline out in the wilderness. Here’s what I scrutinize before recommending any panel for boondocking use:
1. Power Output (Wattage) – How Much Juice Do You Need?
This is arguably the most critical factor. The wattage of a solar panel determines how much power it can generate under ideal conditions. For boondocking, you need to match your panel’s output to your energy consumption. A small 100-watt panel might be fine for charging phones and running a few LED lights, but if you’re powering a compressor fridge, a laptop, and maybe even a small inverter for appliances, you’ll need significantly more.
- Assess Your Needs: Before anything else, make a list of every electrical device you plan to use and how long you plan to use it daily. Calculate your total daily amp-hour (Ah) or watt-hour (Wh) consumption. This is your baseline.
- Panel Sizing: As a rough guide, a 100W panel might generate 25-35 Ah per day in good sunlight. For serious boondockers with a fridge, lights, and charging needs, I often recommend starting with at least 200W-300W of portable solar, especially if you anticipate multi-day cloudy spells. Remember, “rated” wattage is under ideal lab conditions; real-world output is always less.
- Expandability: Look for systems that allow you to link multiple panels together if you foresee your power needs growing.
Don’t skimp here. Underpowering your system is a common mistake that leads to frustration and dead batteries. Aim for a little more than you think you need; you’ll thank yourself on overcast days.
2. Portability and Weight – On the Move
It’s in the name: “portable.” If it’s too heavy or cumbersome to move easily, it defeats the purpose. This is especially true for those of us who might be solo traveling or have limited storage space.
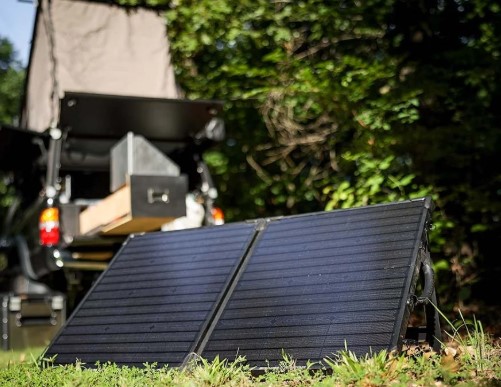
- Foldable vs. Rigid: Most portable panels for boondocking are foldable, often resembling a large briefcase when collapsed. These are fantastic for storage and deployment. Rigid panels offer slightly better durability and efficiency per square foot but are bulkier to transport.
- Weight: Consider how easily you can carry and set up the panel. A 200W foldable panel can range from 20 to 40 pounds. If you need to move it multiple times a day to chase the sun, lighter is definitely better.
- Integrated Handles and Stands: Good portable panels will have sturdy carrying handles and integrated kickstands that allow for easy angle adjustment. Don’t underestimate the value of a well-designed stand for optimizing sun exposure.
I’ve wrestled with many a heavy, awkward panel in my day. Trust me, a panel that’s easy to deploy and reposition will get used more often and more effectively.
3. Durability and Weather Resistance – Built for the Wild
The wilderness is unpredictable. Your portable solar panels need to withstand the elements. They’ll be exposed to sun, wind, dust, and potentially rain or even light snow.
- Materials: Look for panels with robust construction. High-quality tempered glass for rigid panels, or durable ETFE/PET laminates for flexible/foldable panels, are key. The frame should be aluminum, and the fabric backing on foldable panels should be tough, water-resistant canvas.
- IP Rating: While not all manufacturers provide a specific IP (Ingress Protection) rating for portable panels, look for indications of weatherproofing. Connectors should be robust and sealed. You want something that can handle a sudden downpour without frying.
- Impact Resistance: Even foldable panels can take a tumble. Look for reinforced corners and overall sturdy build quality.
My rule of thumb: if it feels flimsy, it probably won’t last long on a rugged boondocking trip. Invest in quality here; it pays dividends in longevity.
4. Solar Cell Efficiency – Making the Most of the Sun
Efficiency refers to how well a panel converts sunlight into electricity. Higher efficiency means more power from a smaller footprint, which is great for portability.
- Monocrystalline vs. Polycrystalline:
- Monocrystalline: These are typically more efficient (18-22%) and perform better in low-light conditions or when partially shaded. They are usually more expensive. Most high-quality portable panels use monocrystalline cells.
- Polycrystalline: Less efficient (15-17%) and generally larger for the same wattage, but they are cheaper to produce. Less common in premium portable panels.
- Shade Tolerance: While monocrystalline panels are better, any solar panel’s output plummets with shade. This is why portability is so crucial – you can move the panel to avoid shadows.
For boondocking, where space and optimal sun exposure can be variable, the higher efficiency of monocrystalline cells is often worth the extra cost. It means you’re getting more watts for your square footage.
5. Charge Controller Type – The Brains of the Operation
A charge controller is essential. It regulates the voltage and current coming from your solar panel to your battery, preventing overcharging and optimizing the charging process. This is a critical component for any of the best portable solar panels for boondocking.
- PWM (Pulse Width Modulation): These are simpler, less expensive controllers. They work by connecting the solar panel directly to the battery, allowing the panel voltage to drop to match the battery’s voltage. This means some power is lost.
- MPPT (Maximum Power Point Tracking): These are more advanced and efficient. MPPT controllers actively track the maximum power point of the solar array, converting excess voltage into amperage. This results in 15-30% more power harvest compared to PWM, especially in cooler conditions or with higher voltage panels.
For serious boondockers, I almost always recommend an MPPT controller. The efficiency gains are significant, particularly when you’re trying to squeeze every last watt out of your panels on less-than-perfect days. Many portable solar kits come with an integrated controller; ensure it’s an MPPT if possible.
6. Connectivity and Compatibility – Plug and Play
You need to ensure your portable solar panel plays nicely with your existing electrical system, especially your battery bank.
- Connectors: The most common connectors for solar panels are MC4. Many portable kits also use Anderson Powerpole connectors or SAE connectors for direct connection to RVs. Make sure the panel comes with the right adapters or that you can easily acquire them.
- Battery Type: Most charge controllers are designed to work with various 12V battery types: lead-acid (flooded, AGM, gel) and lithium iron phosphate (LiFePO4). Ensure the controller has settings for your specific battery chemistry. LiFePO4 batteries are increasingly popular for boondocking due to their lighter weight, deeper discharge cycles, and longer lifespan, so make sure your controller supports them properly.
- Cables: Look for sufficiently long and appropriately gauged cables. Thicker gauge cables minimize voltage drop over distance, which is important when you might be positioning your panels a good distance from your battery.
There’s nothing more frustrating than getting to your campsite with a brand-new solar panel only to realize you don’t have the right adapter. Double-check your connections!
7. Price and Warranty – Investment in Freedom
Portable solar panels represent an investment. Prices vary widely based on wattage, features, and brand reputation.
- Budget: While you don’t need to break the bank, be wary of extremely cheap panels. They often compromise on efficiency, durability, or controller quality. A good 100W foldable kit typically starts around $200-300, with 200W-300W kits ranging from $400-800+.
- Warranty: Look for a reputable brand that offers a solid warranty (typically 1-5 years for the panel itself, sometimes less for controllers). This indicates the manufacturer stands behind their product.
Think of it as an investment in your boondocking freedom. The upfront cost is quickly offset by the savings on generator fuel and the sheer joy of silent, sustainable power.
Maximizing Your Portable Solar Harvest
Having the best portable solar panels for boondocking is only half the battle; knowing how to use them effectively is the other. Here are a few pro tips I’ve learned over the years:
- Angle is Everything: The sun’s angle changes throughout the day and with the seasons. Adjust your panel’s tilt for maximum perpendicular exposure to the sun. In winter, the sun is lower in the sky, requiring a steeper tilt. In summer, a flatter angle might be more appropriate.
- Chase the Sun: Don’t just set it and forget it. Reposition your panels every few hours as the sun moves across the sky. This can dramatically increase your daily energy harvest.
- Avoid Shade at All Costs: Even a small amount of shade on a single cell can significantly reduce the output of the entire panel. Be mindful of trees, branches, or even your own rig casting shadows.
- Keep Them Clean: Dust, dirt, pollen, and bird droppings can reduce efficiency. A quick wipe-down with a damp cloth can make a noticeable difference.
- Optimize Your Power Consumption: Use energy-efficient appliances (LED lights, compressor fridges). Turn off lights when not needed. Charge devices during peak sun hours. Every watt saved is a watt you don’t need to generate.
- Monitor Your System: Many charge controllers come with displays or Bluetooth connectivity, allowing you to monitor real-time power generation and battery status. This helps you understand your system’s performance and make adjustments.
These small habits can make a huge difference in extending your boondocking stays without worrying about power.
Frequently Asked Questions About Portable Solar Panels for Boondocking
Over the years, I’ve heard a lot of questions from folks looking to embrace solar for their off-grid adventures. Here are some of the most common ones:
Q: How many watts of portable solar do I really need for boondocking?
A: This is the million-dollar question, and it entirely depends on your personal power consumption. A good starting point is to calculate your daily watt-hour (Wh) or amp-hour (Ah) usage. List all your devices (fridge, lights, fan, laptop, phone chargers, water pump, etc.), their wattage, and how many hours per day you use them. Sum that up. Then, factor in a buffer for cloudy days or less-than-ideal sun conditions. For light users (charging phones, LED lights), 100-150W might suffice. For moderate users (fridge, laptop, lights, fan), 200-300W is a solid recommendation. Heavy users might look at 400W or more, often combining multiple portable panels or a portable with a rooftop system. Always aim slightly higher than your calculated needs.
Q: Can I leave my portable solar panels out in the rain?
A: Most reputable portable solar panels designed for outdoor use are built to be weather-resistant and can withstand light rain. However, I wouldn’t recommend leaving them out in a heavy downpour or prolonged wet conditions, especially if there’s standing water. Always check the manufacturer’s IP rating or weatherproofing claims. The connectors and charge controller are often the most vulnerable points. If a severe storm is brewing, it’s always safer to stow them away. Durability is key when selecting the best portable solar panels for boondocking.
Q: Do portable solar panels work on cloudy days?
A: Yes, but with significantly reduced output. On heavily overcast days, you might only get 10-25% of the panel’s rated wattage. Lightly cloudy days might yield 50-70%. This is why having a slightly oversized system and an efficient MPPT charge controller is beneficial, as they help capture every available photon. It also highlights the importance of battery capacity – you need enough storage to bridge those low-production days.
Q: What’s the difference between an integrated charge controller and a separate one?
A: Many portable solar kits come with a charge controller built into the panel’s wiring or mounted directly to the back of one of the panels. This offers convenience and a simpler setup, often making them more “plug-and-play.” However, these integrated controllers are typically PWM, which are less efficient. A separate, external MPPT charge controller, while requiring a bit more wiring, will nearly always provide superior performance, especially with higher wattage panels or in challenging conditions. If your budget allows, a separate MPPT controller is usually the better choice for maximizing the output of your best portable solar panels for boondocking.
Q: How do I store my portable solar panels when not in use?
A: Most foldable portable panels come with a padded carrying case, which is perfect for storage. Ensure the panels are clean and dry before packing them away. Store them in a cool, dry place, away from direct sunlight and extreme temperatures. Avoid placing heavy objects on top of them. Proper storage not only protects your investment but also ensures they’re ready for your next adventure.
Q: Can I charge different battery types with the same portable solar setup?
A: Yes, provided your charge controller supports multiple battery chemistries. Most modern charge controllers have settings for flooded, AGM, gel, and LiFePO4 batteries. It’s crucial to select the correct battery type setting on your controller, as charging parameters (voltage, absorption time, float voltage) vary significantly between types. Using the wrong setting can damage your batteries or severely shorten their lifespan. Always refer to your battery manufacturer’s specifications and your charge controller’s manual.
Conclusion: Powering Your Wildest Boondocking Dreams
Boondocking is about freedom, self-reliance, and disconnecting from the grid – but it doesn’t mean disconnecting from essential power. The best portable solar panels for boondocking are your ticket to extended stays in remote locations, keeping your lights on, your food cold, and your devices charged, all while enjoying the peace and quiet of nature.
From understanding your wattage needs and prioritizing portability to recognizing the importance of an MPPT controller and robust construction, choosing the right portable solar setup is a critical step in becoming a truly self-sufficient boondocker. Don’t settle for less; invest in a system that can withstand the rigors of the road and consistently deliver the power you need.
I’ve seen firsthand how a reliable solar setup can transform a good boondocking trip into an unforgettable one. It removes the nagging worry of running out of juice, allowing you to fully immerse yourself in the experience. So, do your research, assess your needs, and gear up with the right portable solar panels. Your next epic, off-grid adventure awaits, fully powered and ready for anything. Happy trails, and may your batteries always be full!